Technical Set Up Workflow Farming Content v3
# AI-Powered Blog Automation with n8n — Technical Setup Guide
This document provides a step-by-step technical guide to set up the complete AI-powered blog automation system using n8n and third-party APIs. It is intended for developers, automation specialists, and technical users who want to deploy, modify, and run the system independently.
- ✨ This workflow is published on the [n8n official website](https://n8n.io/workflows/6734-ai-blog-automation-publish-hourly-seo-articles-to-wordpress-and-twitter-v3/)
- 📚 Checkout the articles [generated with this workflow](https://articles.emp0.com/tag/v3/)
- 🛒 [Buy Now for only $29](https://0emp0.gumroad.com/l/content-farming-v3) and get instant traffic to your blog / wordpress site
## Contents
- [Basics](#basics)
- [Setup](#setup)
- [API Configs](#4-configure-api-credentials)
- [Customization](#customize-the-workflow)
- [Cost Summary](#cost-summary)
- [Final Notes](#final-notes)
---
# Basics
## How It Works
### Step 1: Ingest Recent News via RSS + Vectorization

We scrape articles from predefined RSS feeds and chunk them using a content splitting algorithm, saving them into a vector database (e.g., MongoDB with embedding support or Supabase pgvector). Each chunk includes a SHA256 fingerprint, timestamp, category, source, and embedding vector for similarity search.
```json
[
"https://feeds.bbci.co.uk/news/technology/rss.xml",
"https://www.wired.com/feed/rss",
"https://www.technologyreview.com/topnews.rss",
"https://techcrunch.com/feed/",
"https://www.marktechpost.com/feed/",
"https://hackernoon.com/feed",
"https://www.artificialintelligence-news.com/feed/"
]
```
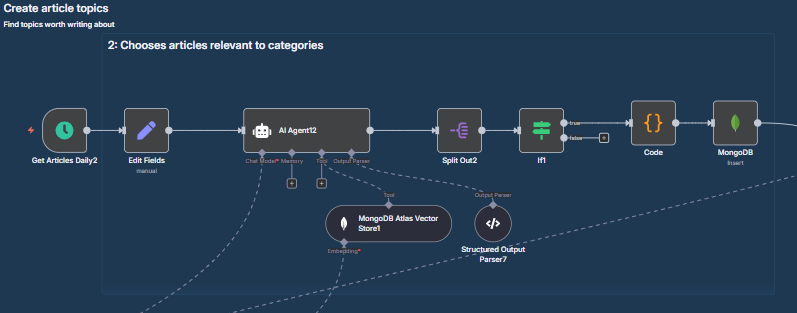
### Step 2: Topic Generation with Semantic Clustering
A topic extraction agent queries the vector store and groups article clusters by semantic similarity. This enables the workflow to determine what topic has recurring relevance improving freshness and relevance.
### Step 3: Research + Data Enrichment
For the selected topic:
- The workflow extracts quotes, facts, entities, source credibility, outbound links.
- It generates related and main keywords using LSI (Latent Semantic Indexing).
- It checks for existing SEO competition to tailor a unique angle.
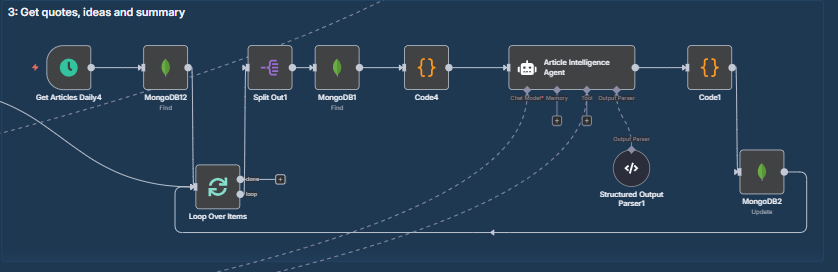
### Step 4: Content Generation (3 Agent Loop)

The article is generated in a loop involving:
- Task Definition Agent: plans the structure, section breakdown, tone, and goals.
- Content Generation Agent: writes each block of the article with access to tools like:
- Internet search to generate outbound links (via MCP tool)

- Image generation (Leonardo AI or DALL·E via MCP)

- Chart/graph generation (via QuickChart )

- Quality Control Agent: validates article length, readability, Flesch Kincaid score, SEO score, keyword density, uniqueness, narrative flow, and backlink count.
The agents operate in a looped chain of thought format using n8n loops and memory iterating until the article crosses an 80% quality threshold or max loop limit.
### Step 5: Blog Title Optimization
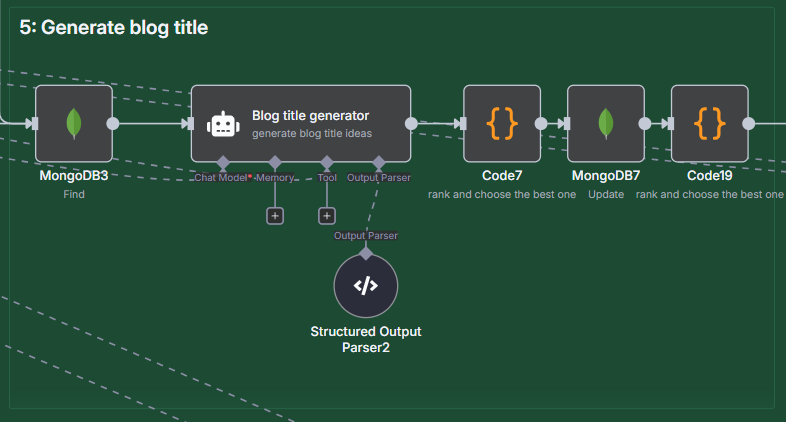
We generate 5 SEO optimized blog titles using GPT-4 and rank them by CTR potential using simulated headline testing techniques. The best one is selected.
### Step 6: Metadata Generation
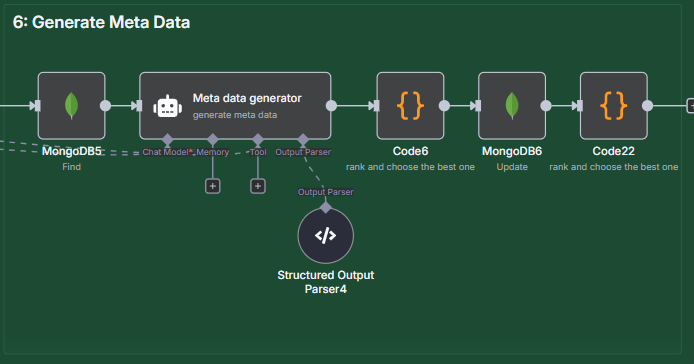
This includes:
- Meta Title
- Meta Description
- URL Slug
- Alt Tags
- SEO Report
- Estimated Read Time
- Category + Tags
### Step 7: Featured Image Generation
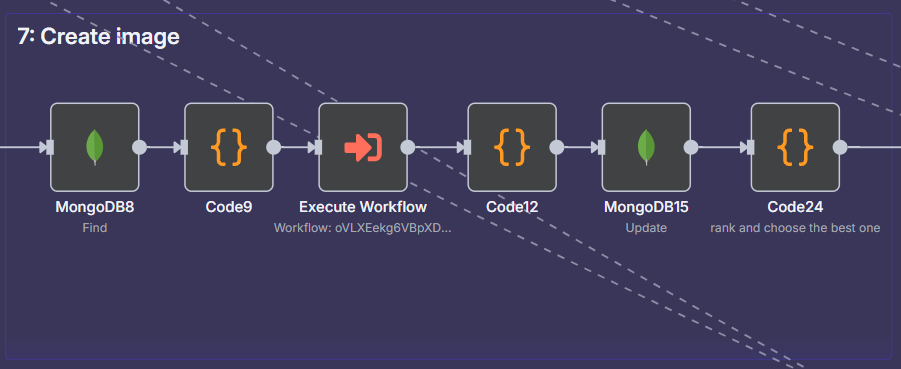
A separate MCP (Model Context Protocol) tool generates a custom hero image based on the blog content using prompts tailored to your site branding.
### Step 8: WordPress Draft Creation

The article is sent to WordPress using its REST API with:
- HTML content blocks
- Featured image
- Meta tags
- Internal/external links
- Slug and publishing date
### Step 9: Distribution
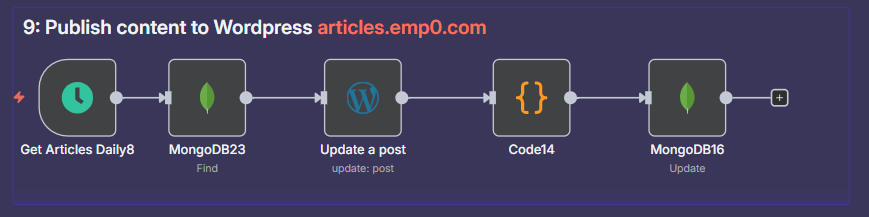
We stagger publishing based on platform analytics:
- Twitter (X): publish image+caption+link using the Twitter API

- Dev.to: repurpose into Markdown format and post using Dev.to’s API
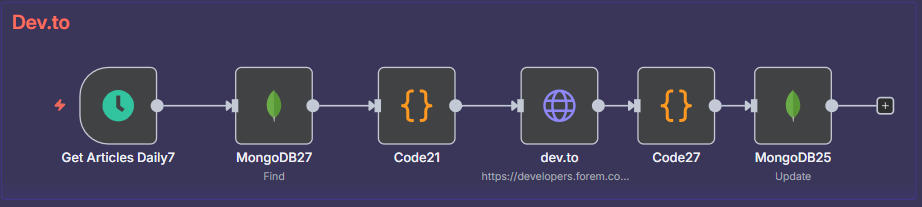
- Optional: schedule via n8n timers for different timezones and platform peak engagement windows
---
## What makes this flow unique ?
### 3 AI Agent Architecture
This isn’t just automation. It’s AI workflow orchestration. You get a full scale, modular content team simulated by multi agent communication using the following architecture:

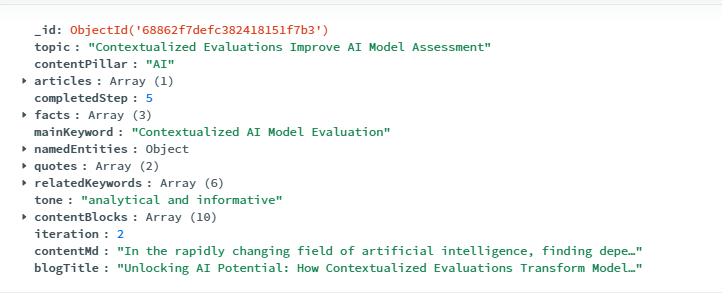
### Save progress
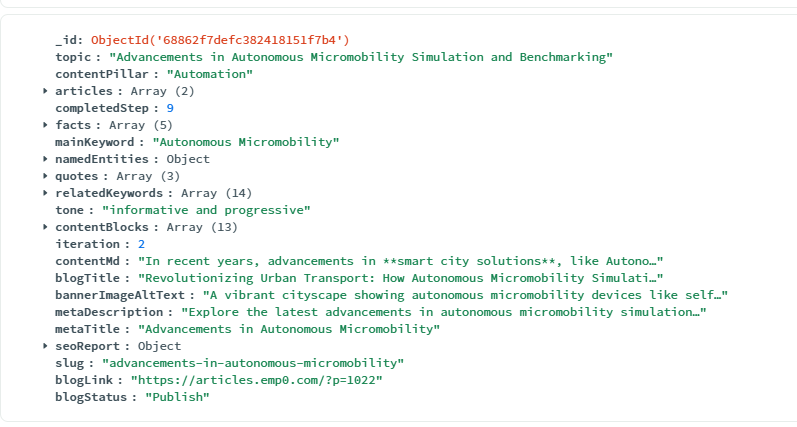
All progress is saved step by step using a completedStep field so if the process fails midway, you can restart it from the failed node without regenerating the entire flow.
Completed step 5
Completed step 9
---
# Setup
## 1. Deploy Your n8n Instance
You can either:
### Option A: Use n8n Cloud
1. Register here: [n8n Cloud Signup](https://n8n.partnerlinks.io/emp0)
2. Login and go to Workflows > New Workflow
Cost: $20 per month
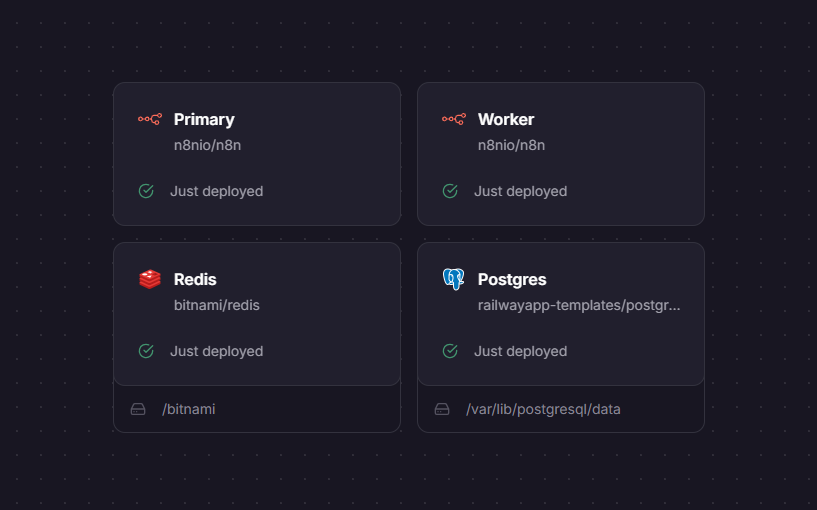
### Option B: Deploy on Railway (Recommended)
1. Go to this Railway template: [Deploy n8n on Railway](https://railway.com/deploy/n8n-with-workers?referralCode=jay)
2. Create a custom domain and connect it to your n8n on Railway (optional)
3. Deploy and access your n8n instance.
4. Create a username and password for your admin user
Cost is $5 per month but will scale with usage. I realistically spend around $20 per month. You can alternatively [deploy n8n on hostinger](https://www.hostinger.com/vps/n8n-hosting) which is cheaper in my opinion
---
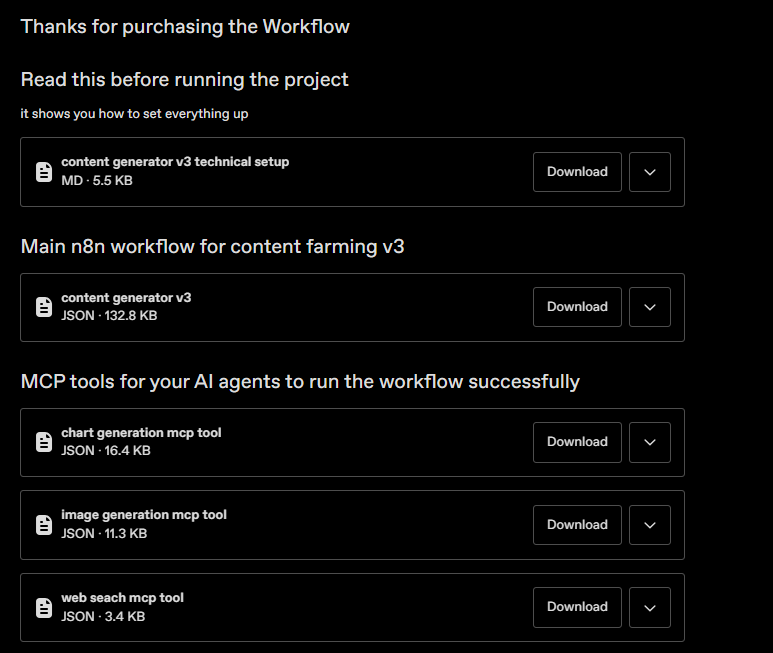
## 2. Download the Workflows
Download the 4 workflows from Gumroad after purchase:
1. Content Generator v3
2. Chart generation MCP tool
3. Image Generation MCP tool
4. Web Search MCP tool
---
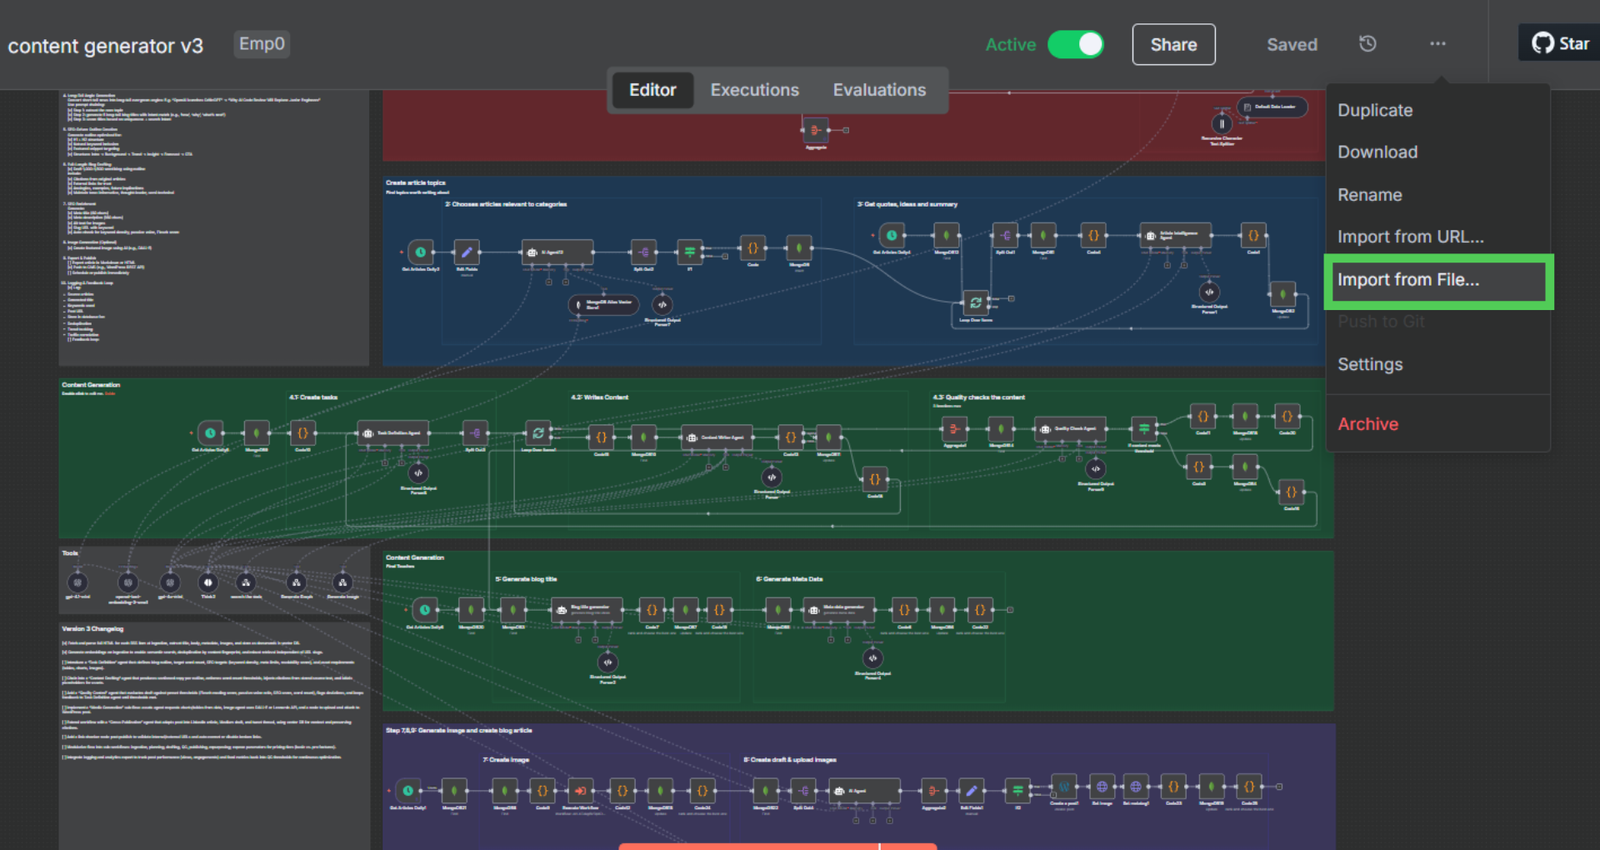
## 3. Import to n8n
1. Open your n8n instance.
2. Go to Workflows > Import Workflow.
3. Upload each workflow `.json` file.
4. Rename and organize them appropriately (e.g., `01_content_ingestion`, `02_generate_article`, etc).
---
## 4. Configure API Credentials
### 4.1 OpenAI API Key
1. Get your API key from: [OpenAI Platform](https://platform.openai.com/account/api-keys)
2. In n8n, go to Credentials > OpenAI API > Add new.
3. Paste your key and save.
Cost: Free to register. Need to top up around $10, The monthly cost will be around $100
### 4.2 MongoDB Atlas (Vector DB + Document Storage)
MongoDB Atlas serves as both your vector database for embeddings and document storage for the workflow's content chunks. Here's how to set it up:
#### Step 4.2.1: Create MongoDB Atlas Account
1. Register at [MongoDB Atlas](https://www.mongodb.com/cloud/atlas)
2. Sign up for a free account using your email address
3. Complete the account verification process
#### Step 4.2.2: Create Your First Cluster
1. After logging in, click "Build a Database"
2. Select "M0 Sandbox" (Free tier)
3. Choose your preferred cloud provider (AWS recommended)
4. Select a region closest to your n8n deployment
5. Give your cluster a name (e.g., `content-generator-cluster`)
6. Click "Create"
#### Step 4.2.3: Configure Database Access
1. In the "Security" tab, click "Database Access"
2. Click "Add New Database User"
3. Choose "Password" authentication method
4. Create a username (e.g., `n8n-user`)
5. Generate a secure password and save it
6. Set database user privileges to "Read and write to any database"
7. Click "Add User"
#### Step 4.2.4: Configure Network Access
1. In the "Security" tab, click "Network Access"
2. Click "Add IP Address"
3. For development, click "Allow Access from Anywhere" (0.0.0.0/0)
4. For production, add your specific n8n server IP address
5. Click "Confirm"
#### Step 4.2.5: Get Your Connection String
1. Go to "Deployment" > "Database"
2. Click "Connect" on your cluster
3. Select "Connect your application"
4. Choose "Node.js" and version "4.1 or later"
5. Copy the connection string
6. Replace `<password>` with your database user password
7. Replace `<dbname>` with `contentgen` (or your preferred database name)
Example connection string:
```
mongodb+srv://n8n-user:yourpassword@content-generator-cluster.abc123.mongodb.net/contentgen?retryWrites=true&w=majority
```
#### Step 4.2.6: Create MongoDB Credential in n8n
1. In your n8n instance, go to "Credentials"
2. Click "Add Credential"
3. Search for and select "MongoDB"
4. Enter your connection string from Step 4.2.5
5. Test the connection to ensure it works
6. Save the credential with a descriptive name like `MongoDB-ContentGen`
IMPORTANT: Run step 1 of the workflow to ensure we have some data in the collection `news`
#### Step 4.2.7: Set Up Vector Search Index (Critical for AI Functionality)
The workflow requires vector indexes for semantic search capabilities. Here's how to create them:
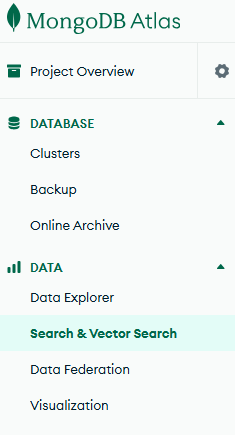
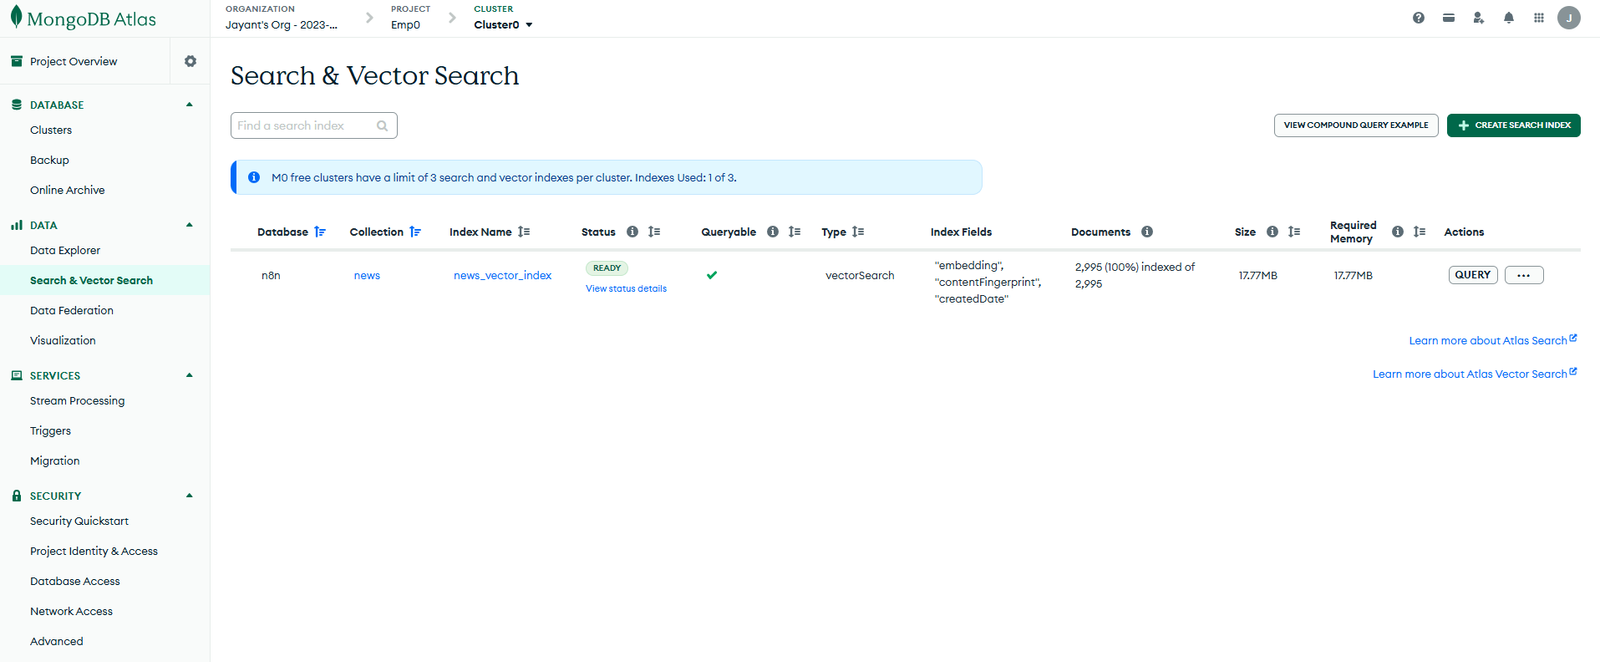
##### Navigate to Atlas Search
1. In your MongoDB Atlas dashboard, go to your cluster
2. Click on the "Search" tab
3. Click "Create Search Index"
Navigate to the Atlas Search section to begin creating your vector search index
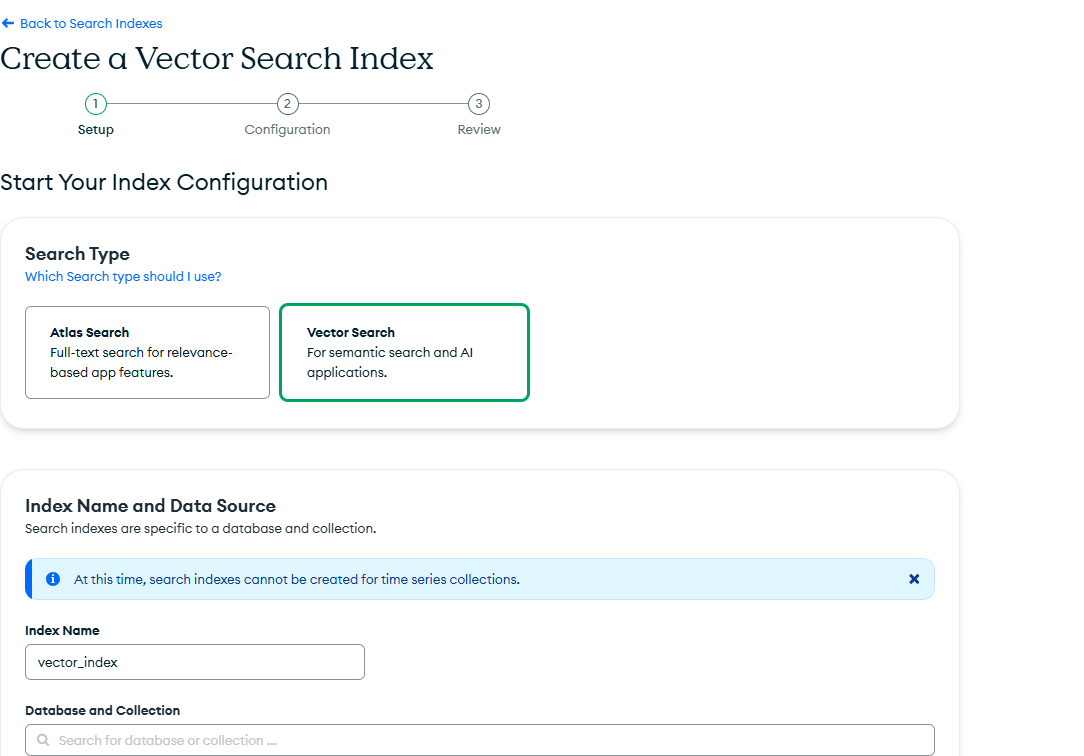
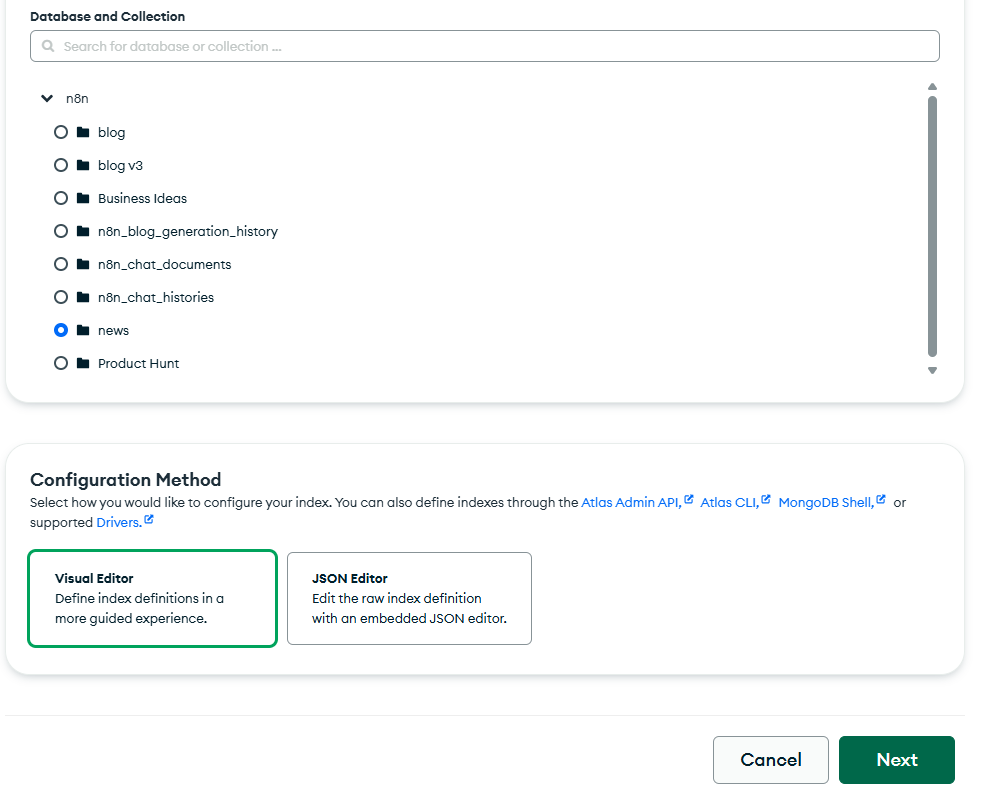
##### Choose Index Configuration Method
1. Select "JSON Editor" for advanced configuration
2. Choose your database (e.g., `contentgen`)
3. Select the collection: `article_chunks`
Use the JSON Editor to configure your vector index with precise settings for the article_chunks collection
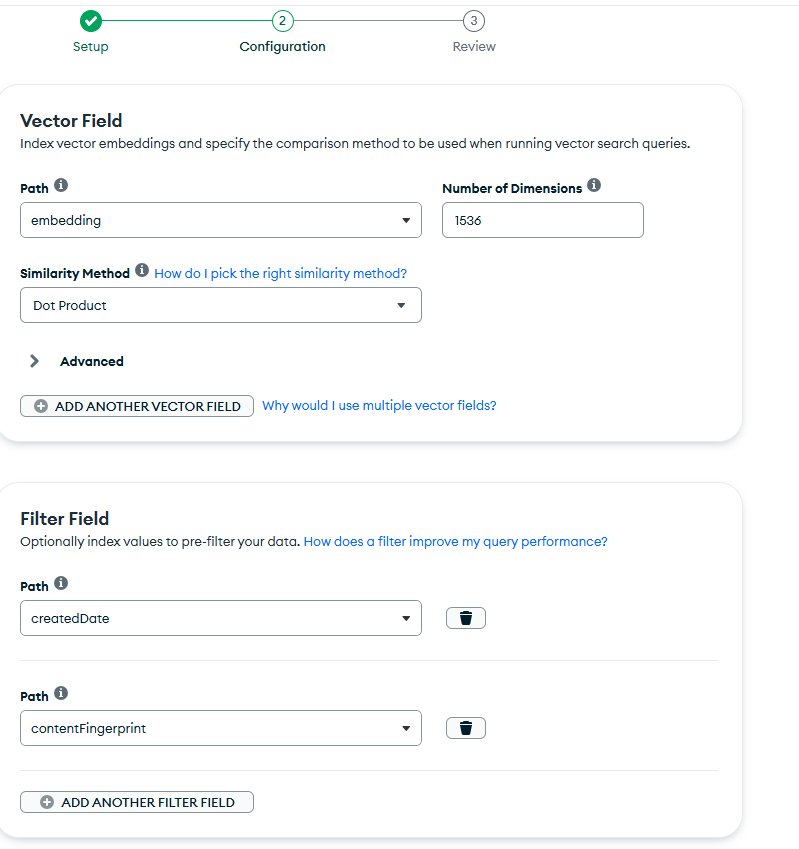
##### Configure the Vector Index
Create vector index:
Configure the vector index with 1536 dimensions for OpenAI embeddings and cosine similarity for accurate semantic search
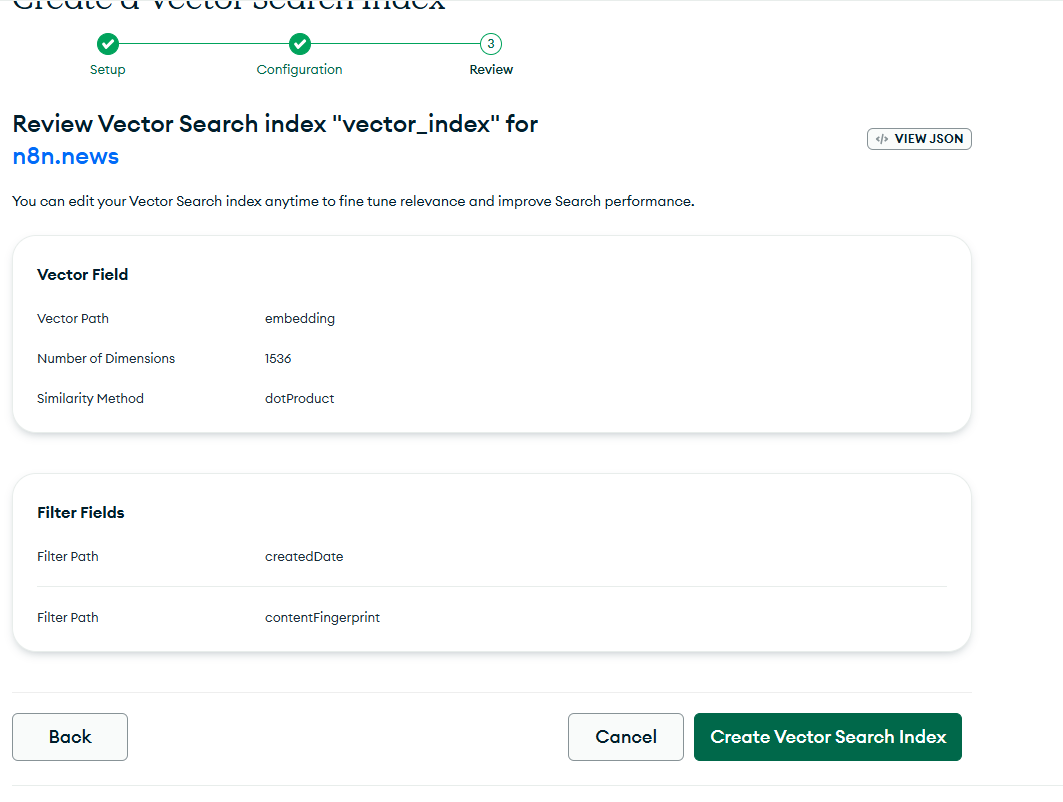
##### Review and Name Your Index
1. Name your index: `vector_search_index`
2. Review the configuration to ensure it matches your needs
3. Click "Create Search Index"
Name your vector index clearly and review all settings before creation
##### Monitor Index Creation
1. Wait for the index to build (this may take 2-5 minutes)
2. The status will show "Active" when ready
3. You can monitor the progress in the Atlas Search dashboard
Monitor the index creation progress - wait for "Active" status before using the workflow
##### Verify Index is Working
1. Once active, you can test the index using the Atlas Search playground
2. Verify that vector searches return relevant results
3. The index should now be ready for the n8n workflow
Confirm your vector index is active and ready - this enables semantic search for topic clustering and content generation
#### Step 4.2.8: Initialize Required Collections
The workflow automatically creates these collections, but you can verify them in MongoDB Compass or Atlas UI:
- `article_chunks`: Stores vectorized content chunks from RSS feeds (requires vector index)
- `generated_articles`: Stores completed articles and metadata
- `topics`: Stores extracted topics and clustering data
Cost: Free for an M0 cluster with 500MB storage - sufficient for the first 3-6 months of operation
⚠️ Important Notes:
- Vector search requires at least an M10 cluster for production workloads
- The M0 free tier supports Atlas Search but with limited performance
- For high-volume content generation, upgrade to M10+ clusters
- The vector index is essential - the workflow will fail without it
- Monitor your storage usage as embeddings consume significant space
### 4.3 Leonardo AI (Image Generation)
To create your Leonardo AI credential, follow these steps:
Open your "Leonardo" `HTTP Header Auth` credential in n8n and ensure you have added the required authentication header. For Leonardo.Ai, this is typically an API key sent as a header, for example:
Name: `Authorization`
Value: `Bearer YOUR_API_KEY`
You can edit your credential and add this in the "headers" section as:
```json
{
"headers": {
"Authorization": "Bearer YOUR_API_KEY"
}
}
```
Replace `YOUR_API_KEY` with your actual Leonardo.Ai API key.
After updating, save the credential and re-run your workflow.
⚠️ Make sure the word “Bearer ” is included before your API key, otherwise the authentication will not work.
Cost: $10 but realistically will cost $20 per month
### 4.4 WordPress API Setup
#### On WordPress:
1. Go to your Wordrpess admin dashboard. Usually its [yourwordpress.com/wp-admin](yourwordpress.com/wp-admin)
2. Go to Users > Your Profile > Application Passwords and generate one.
3. Note your WordPress username, site URL, and app password.
#### On n8n:
1. Go to Credentials > HTTP Basic Auth
2. Enter:
- Username: your WordPress username
- Password: the application password
3. Use this credential in WordPress-related nodes.
### 4.5 Twitter API Setup
1. Apply for a Twitter Developer account at [Twitter Developer Portal](https://developer.twitter.com)
2. Create an App under your project.
3. Go to Keys & Tokens tab:
- Consumer Key & Secret
- Access Token & Secret
4. In n8n, go to Credentials > Twitter OAuth1
5. Enter these four values.
### 4.6 Dev.to API Setup
1. Go to [Dev.to Account Settings](https://dev.to/settings/account)
2. Copy your DEV API Key.
3. Add to n8n as a Header in HTTP Request node:
- Header name: `api-key`
- Value: `<your_dev_api_key>`
---
# Customize the workflow
## 5. Adjusting the Workflow
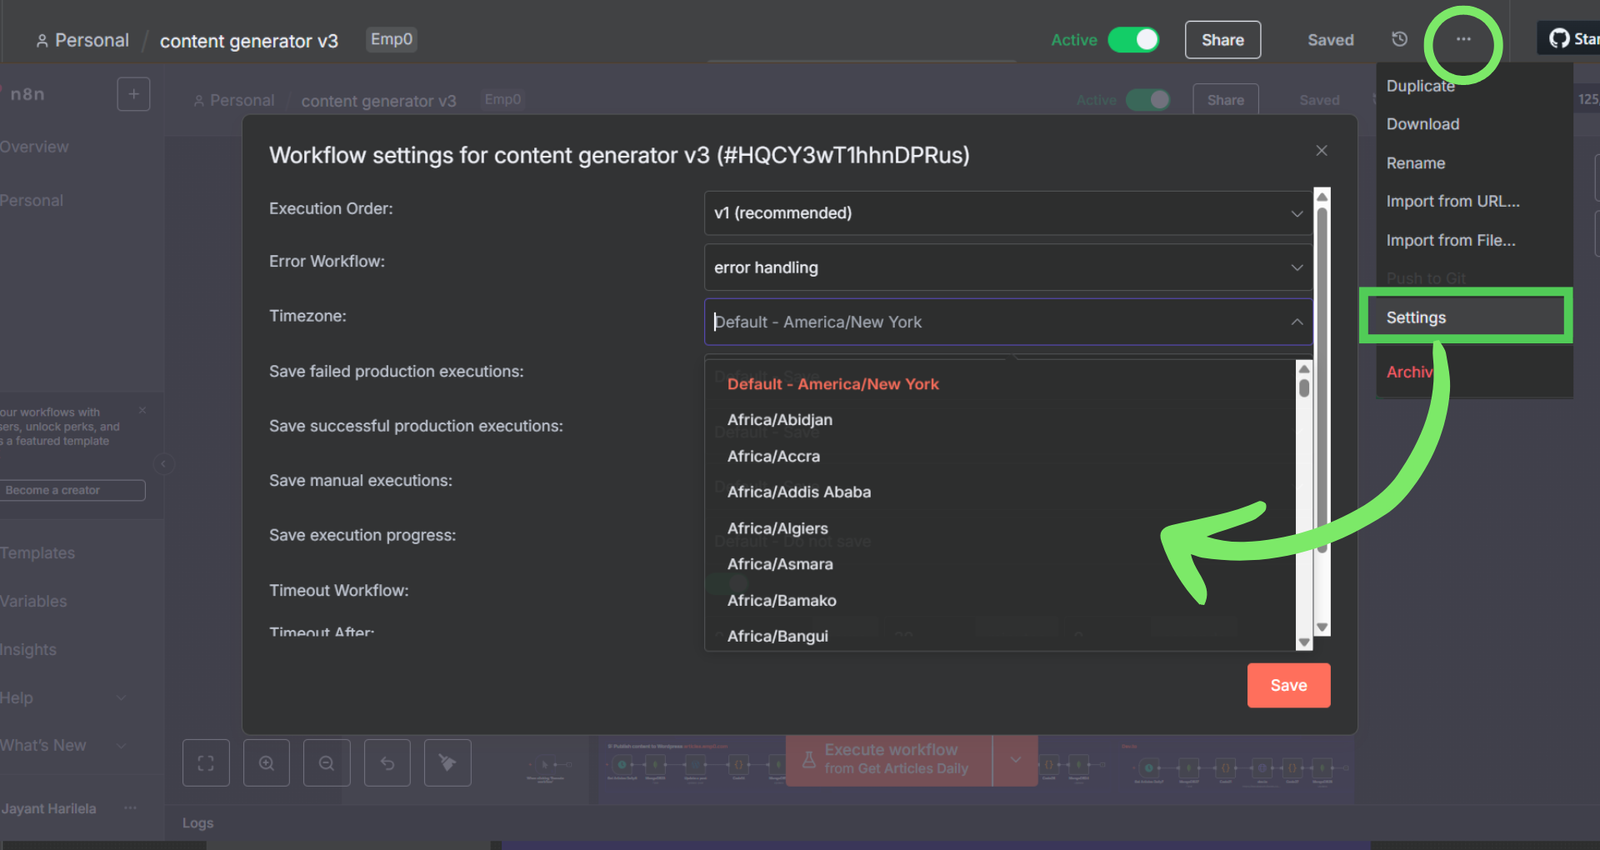
### Set Timezone
1. Go to each schedule node.
2. Set timezone to your local timezone (e.g., `Asia/Jakarta`).
### Timing Control
- Step 1 (Ingestion): Run at 8 AM
- Step 2 (Topic Selection): Run at 9 AM
- Step 3–9: Run hourly from 10 AM to 4 PM (or customize as needed)
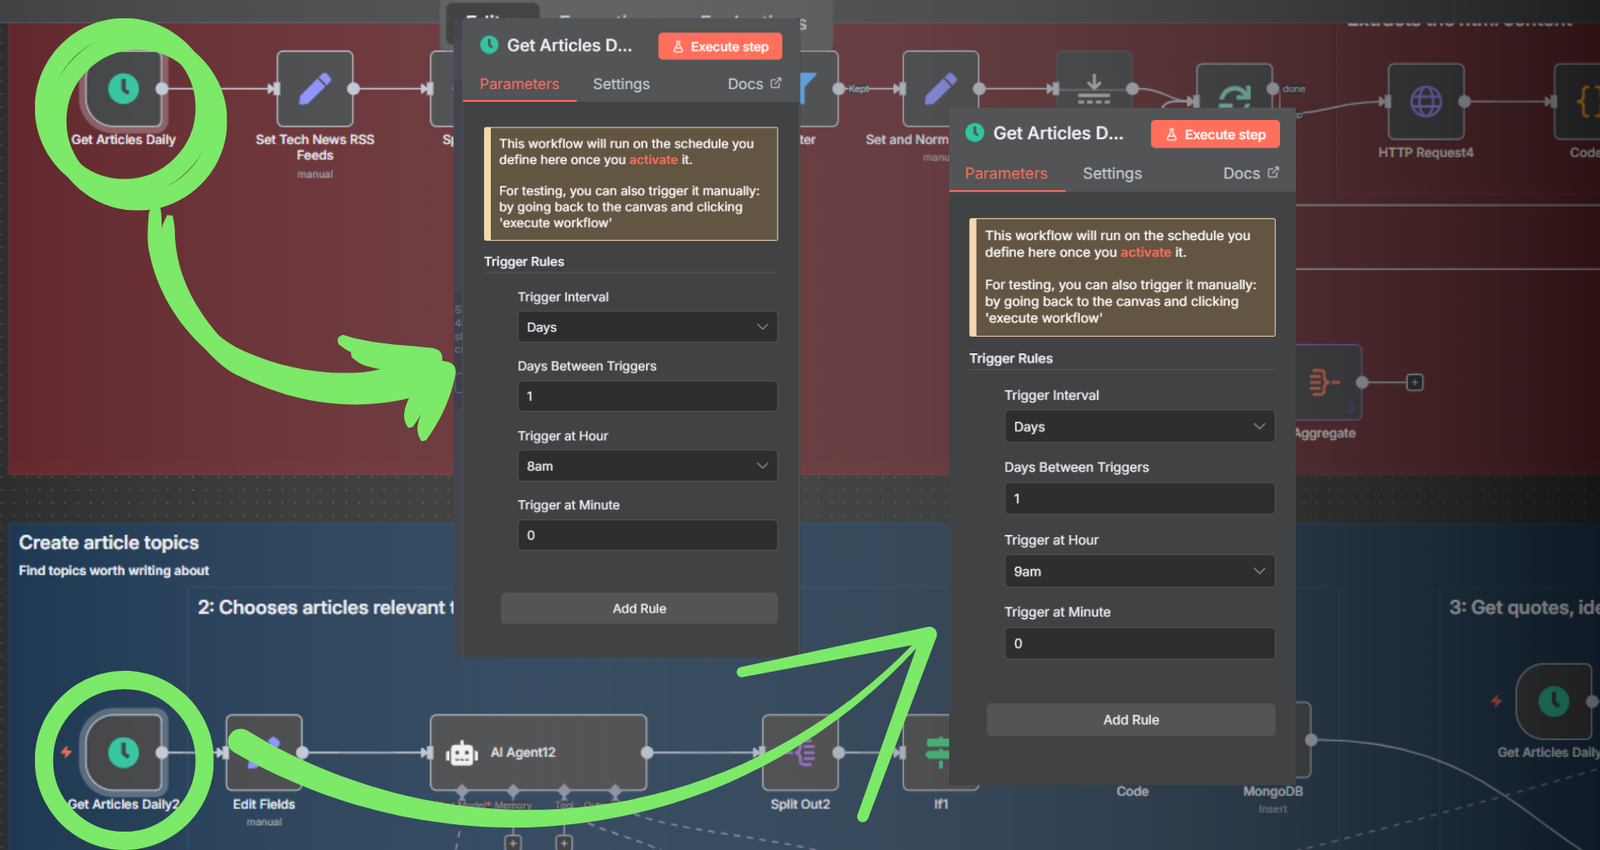
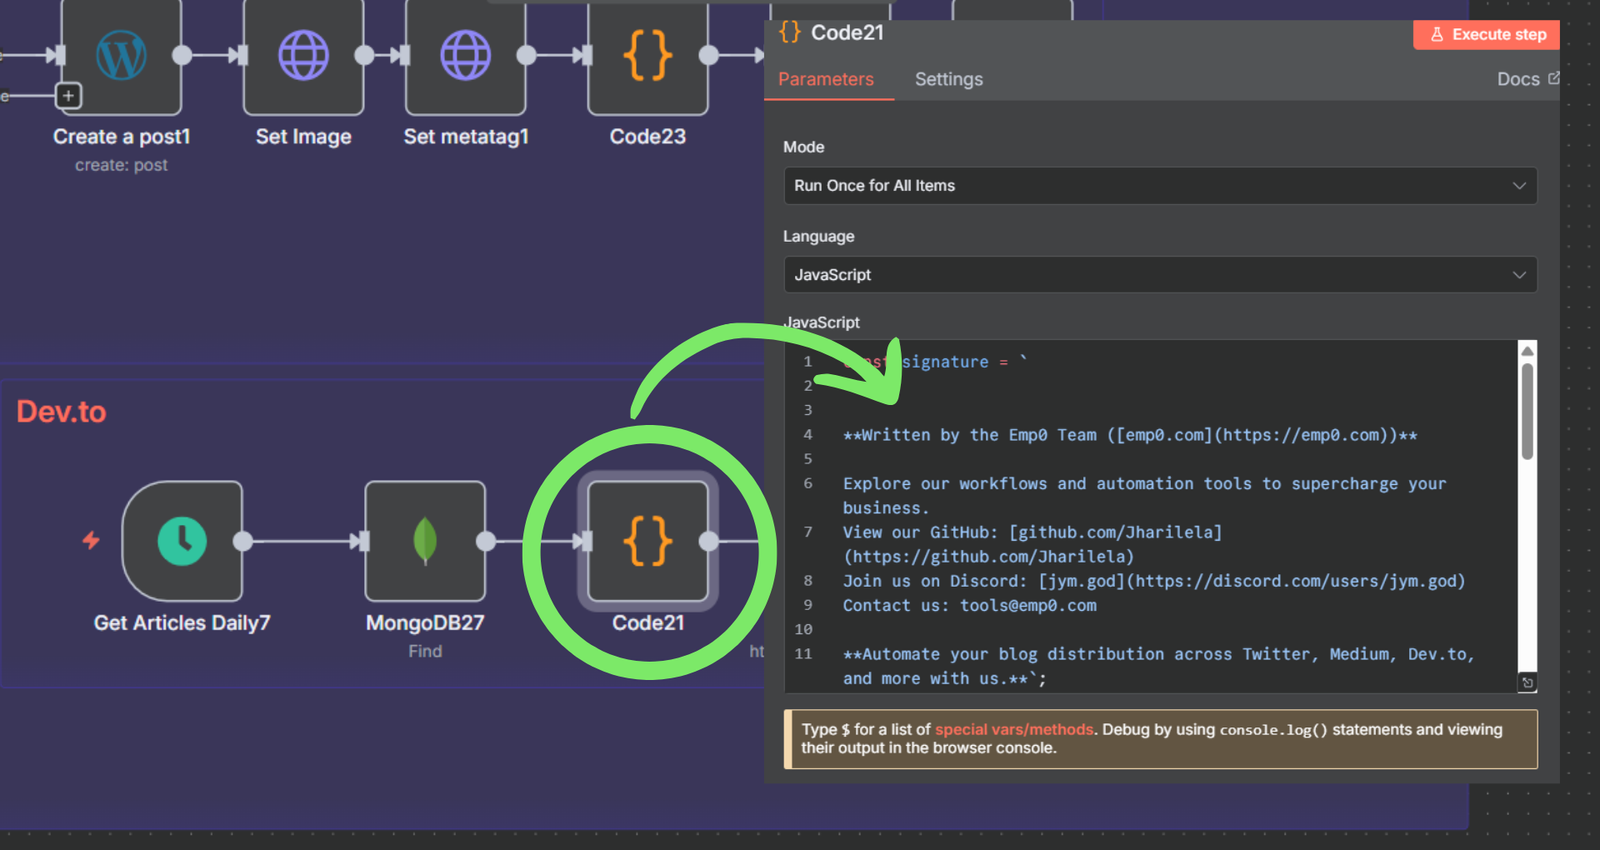
### Signature Customization
Edit the Markdown signature block in the last step before publishing to Dev.to or WordPress. Example:
``` markdown
Written by [Your Company Name](https://yourdomain.com)
📬 Reach us at: [hello@yourdomain.com](hello@yourdomain.com)
🐦 Twitter: [@yourhandle](https://twitter.com/yourhandle)
```
---
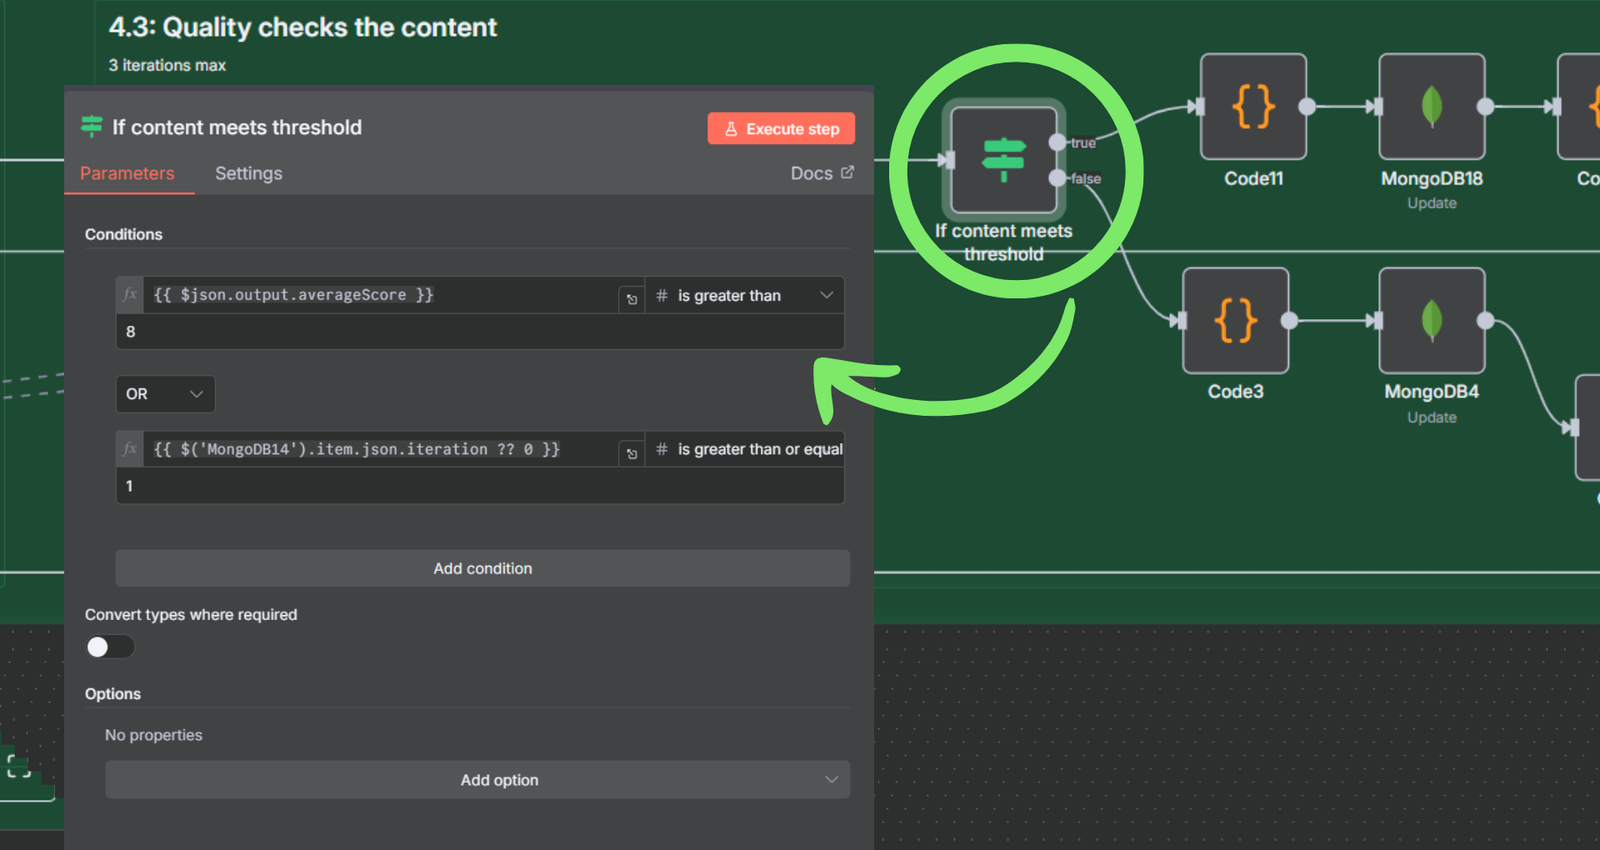
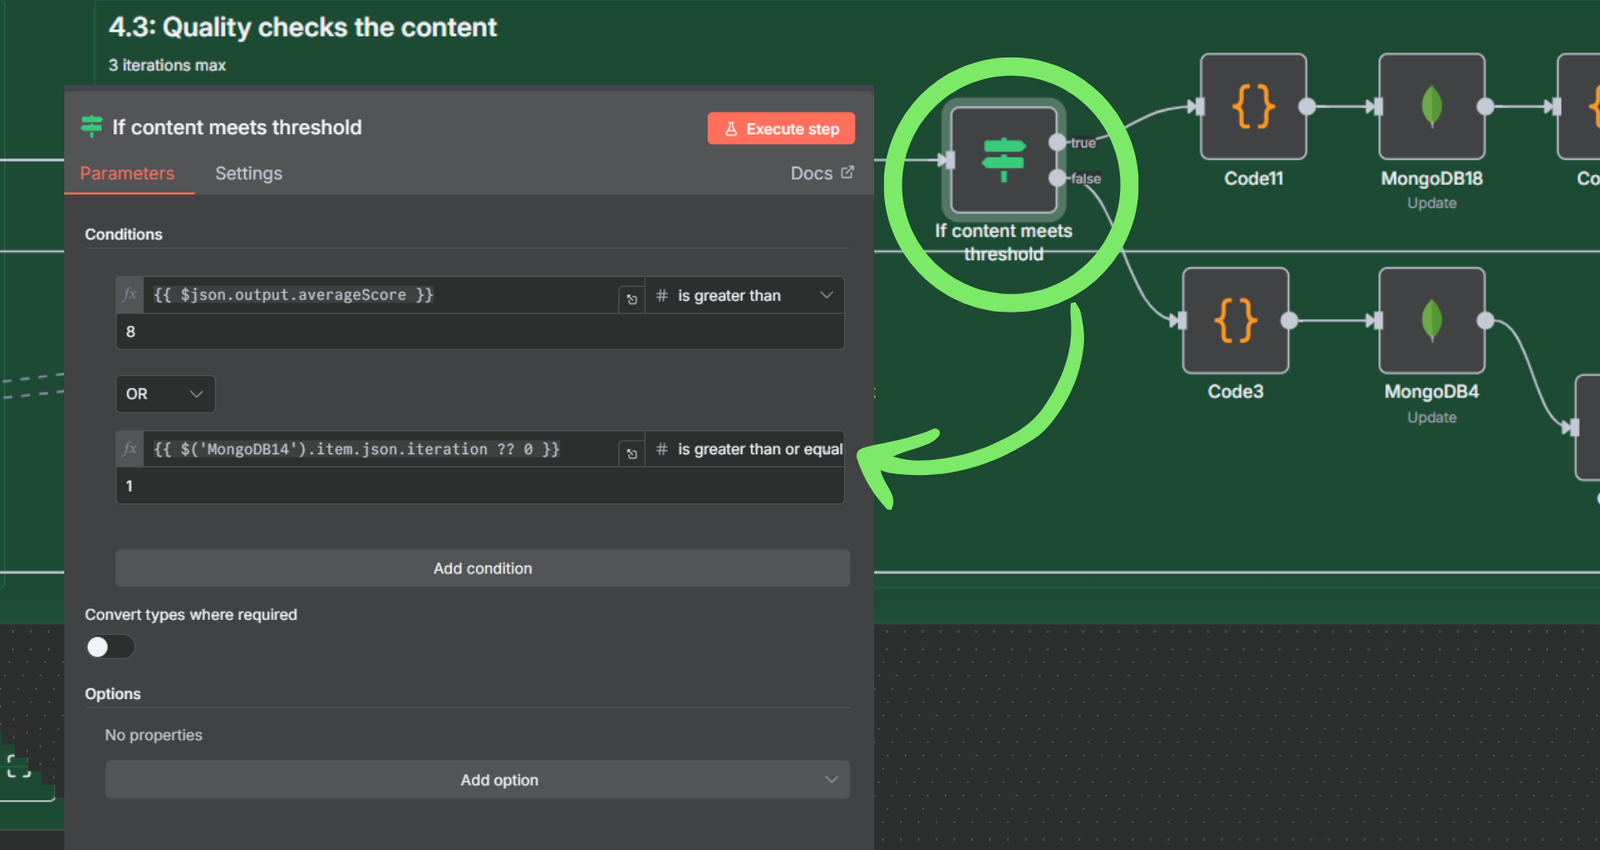
### SEO Quality Threshold
- Inside the QC Agent node, adjust the success condition (default `>= 8`).
- Recommended minimum: 7%. Avoid setting to 10 (100%), as it's extremely rare to reach and causes loops.
### Max Iterations (AI Loop Control)
- Navigate to the `Do While` loop.
- Set maximum iterations to `1` if optimizing for token costs.
- You can raise it to `2–3` for better quality.
### Define Your Content Pillars + RSS Feeds
At the beginning of the ingestion flow, edit the `Set` node to:
- Add content pillars, e.g., `AI`, `Automation`, `Business Ideas`
- Match pillar → WordPress Category ID map
- Add relevant RSS feed URLs
Example rss feed:
``` json
[
"https://feeds.bbci.co.uk/news/technology/rss.xml",
"https://www.wired.com/feed/rss",
"https://www.technologyreview.com/topnews.rss",
"https://techcrunch.com/feed/",
"https://www.marktechpost.com/feed/",
"https://hackernoon.com/feed",
"https://www.artificialintelligence-news.com/feed/"
]
```
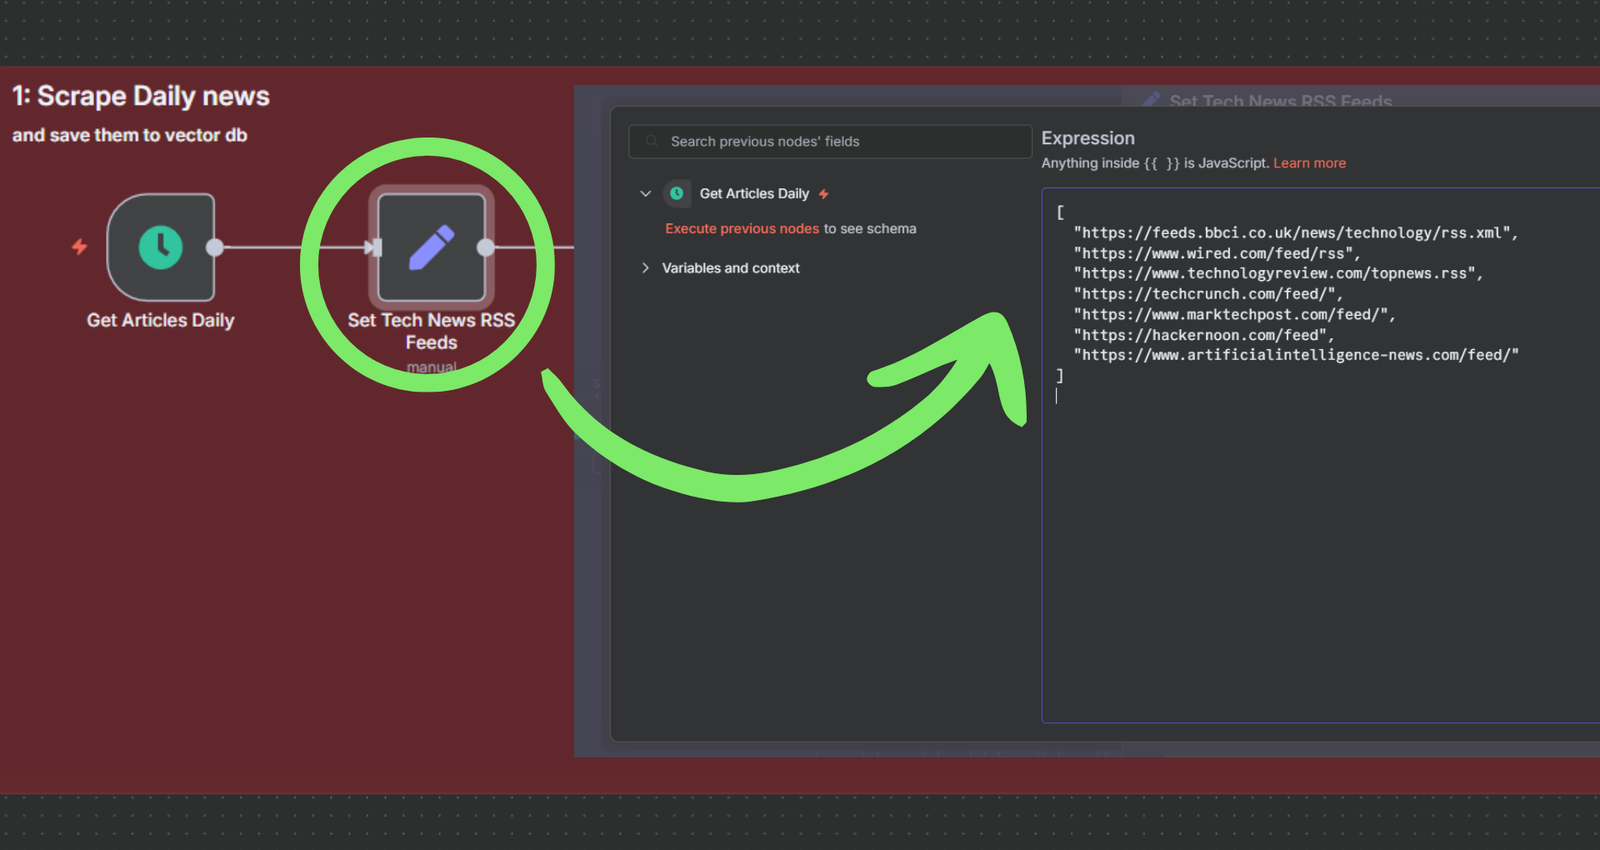
Example category list
```json
[
{
"name": "AI",
"description": "Articles on AI and artificial intelligence, including machine learning, neural networks, and AI trends.",
"id":8
},{
"name": "Automation",
"description": "Articles on automation technologies, workflow automations, integrations, and process optimization.",
"id":9
},{
"name": "Business Ideas",
"description": "Articles on innovation, startup concepts, monetization strategies, and business model generation.",
"id":7
}
]
```
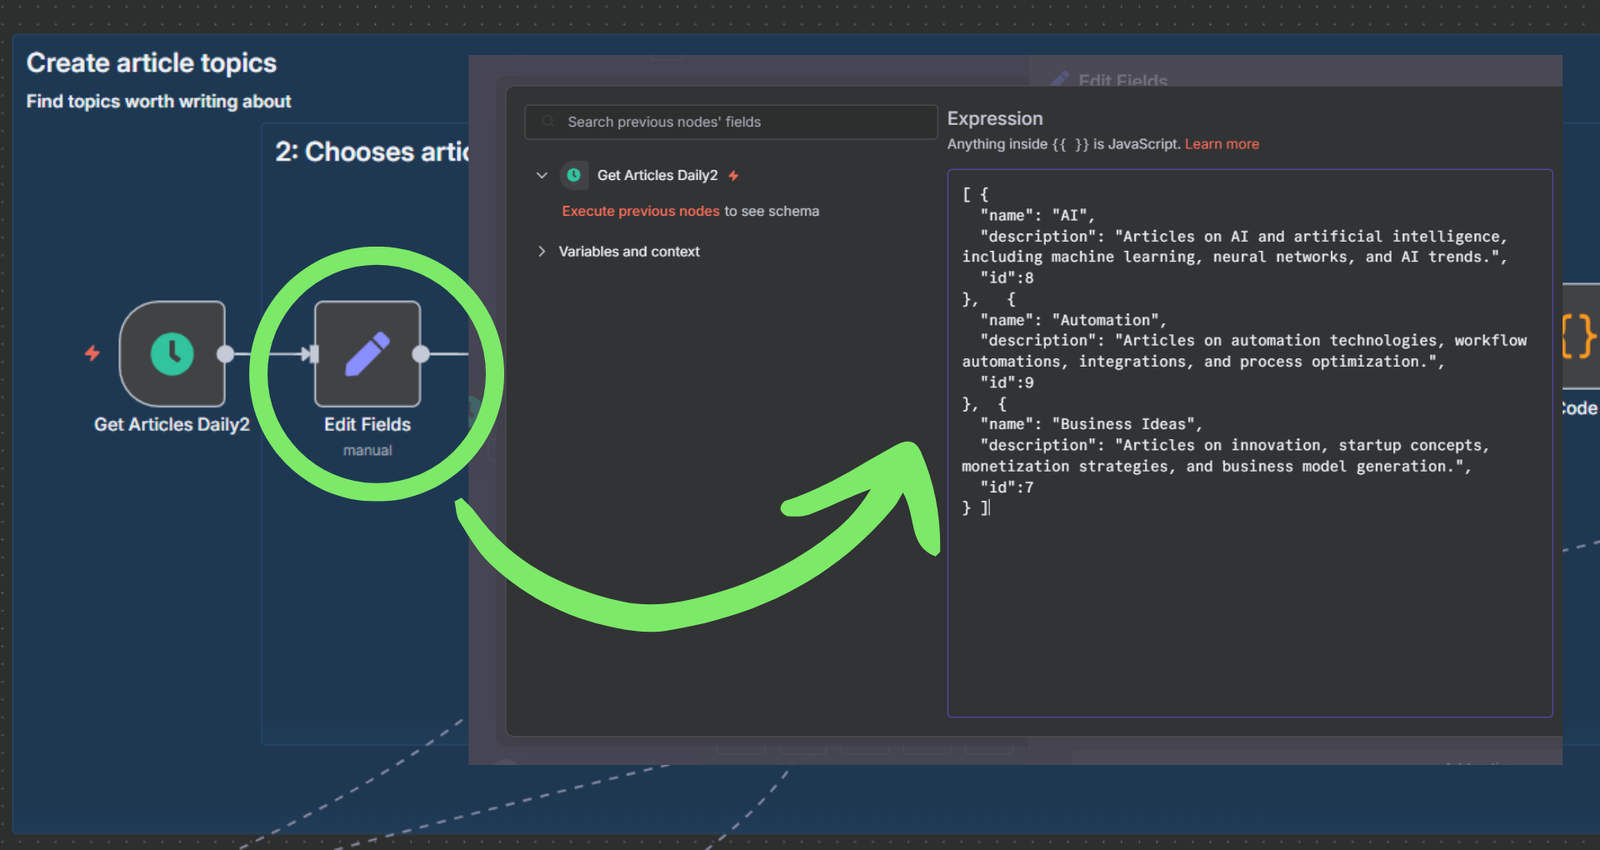
---
# Cost Summary
| Service | Monthly Cost Estimate |
|-------------------|------------------------|
| OpenAI | $100 |
| Leonardo AI | $20 |
| MongoDB Atlas | Free (M0) |
| Railway (n8n) | $20 |
| Monthly Estimate | $150 |
---
# Final Notes
- Each workflow saves state in `completedStep` so that you can recover if it fails midway.
- Make sure all credentials are active and environment variables set.
- Test each step manually before activating timers.
You're now fully equipped to automate your blog with cutting-edge AI, auto-publishing, and multi-platform distribution.
Need help with advanced customization, platform migration, or custom agents? Contact us for enterprise setup assistance.
[Email](tools@emp0.com)
[Discord](https://discord.com/users/jym.god)
[Official website](https://emp0.com)